Here is a recipe that is loaded with different types of flour, grains, and seeds. It is easy to make, it is healthy, and it is very tasty. Again, the pictures are of the loaves that I made using this recipe. I baked them freeform. I don't slash these loaves as they have large seeds like pumpkin seeds and sunflower seeds on the top and they make it easy to rip the dough instead of slash the dough.....and if that happens, you can delfate the dough.....usually with not good results((
1 cup lukewarm water
1/4 cup honey (scant)
1/4 cup canola oil (scant)
1 large egg, room temperature
1 Tbsp instant yeast
1 Tbsp salt
2 Tbsp gluten
2 cups whole-wheat flour
2 to 2 1/2 cups all-purpose flour
1 egg beaten with 2 Tbsp water for egg wash
1 Mix all the seeds together and set aside. 2 Put the milk in a saucepan and heat to the scalding point. Add the bulgur and quick oats, stir to combine, and set aside to cool, about 30 minutes. 3 Put the milk mixture, water, honey, oil, egg, yeast, salt, gluten, and 2 cups of both flours in the bowl of a stand mixer equipped with a kneading hook. Knead until the dough is soft and elastic, about 5 minutes. If necessary, add 1 Tbsp all-purpose flour at a time until the dough starts to leave the sides of the bowl. Add half the seed mixture and knead until combined, about 2 minutes. 4 Put in a lightly greased bowl, turn to coat, cover with saran, and let rise in a warm place until doubled in size, about 1 hour. 5 Put a large piece of parchment paper on top of a pizza peel or an inverted baking sheet. Lightly flour the parchment paper or sprinkle with cornmeal. 6 Turn out the dough onto a lightly floured surface and divide the dough in half. Shape each piece of dough into a round or oblong loaf. Place the two loaves on the floured parchment paper, allowing enough space between them for rising. Dust the surface of the loaves with flour and then cover them loosely with saran or a plastic bag. Let rise in a warm place until almost doubled in size, about 35 to 45 minutes. 7 Put a bread stone on the middle rack of the oven and preheat the oven to 350F. 8 Baste the risen loaves with the egg wash and then sprinkle the tops of the loaves with the remaining seed mixture. 9 Slide the loaves and the parchment paper onto the bread stone. If you don’t have a bread stone, simply bake the risen loaves on the inverted baking sheet. Bake the loaves for 35 to 45 minutes, or until the loaves are a rich golden brown and the bottoms sound hollow when thumped. Remove the baked loaves from the oven and transfer to a wire rack to cool completely before slicing and serving.
Makes 2 loaves.
Note: I add an extra tablespoon of sunflower and pumpkin seeds to the dough.
Note: If you have regular yeast instead of instant yeast, it must be proofed first. Dissolve the yeast and 1 tsp honey in half the lukewarm water and set aside until foamy, about 10 minutes.
The Following 6 Users Say Thank You to redforever For This Useful Post:
5-Minute No Knead Bread has been quite the rage for a few years now. You simply mix up the dough with a whisk or wooden spoon, proof, then cover and transfer to the refrigerator for long term storage. By long term, we are talking maximum of 10 to 14 days.
This no knead seed bread is easy, very tasty, quite easy. The second part of the recipe is my adaptation, where you can make the dough and bake the loaf of bread in the same day, without the refrigeration. The finished loaf will not be quite as chewy as if it has hydrated in the refrigerator at least over night, but it is still a very tasty loaf of bread.
No Knead Seeded Oat Bread
2 cups whole-wheat flour
3 1/2 cups unbleached all-purpose flour
1 1/2 cups old-fashioned oats
2 Tbsp flax seeds, plus 2 Tbsp for sprinkling on top
3/4 cup pumpkin seeds, plus 2 Tbsp for sprinkling on top
3/4 cup sunflower seeds, plus 2 Tbsp for sprinkling on top
1/4 cup sesame seeds, plus 2 Tbsp for sprinkling on top
2 Tbsp poppy seeds for sprinkling on top
1 Tbsp sea salt
1/4 cup wheat gluten
3 cups lukewarm water
1 1/2 Tbsp yeast
1/3 cup honey
1/4 cup canola oil
1 egg, beaten with 2 Tbsp water for egg wash
1 Whisk together the flours, oats, seeds, salt, and wheat gluten in a large container with a lid. Combine the water, honey, and yeast and proof 5 minutes or until foamy. Add the water mixture and the oil to the dry ingredients, mixing well with a wooden spoon or a bread whisk. Cover (not airtight) and let rise at room temperature until it doubles in size and starts to flatten on top, 1 to 2 hours. The dough can be used right away but it is easier to handle when cold. Put the lid on tightly and refrigerate and use the dough over the next 5 days.
2 On baking day, generously flour a work surface. Scoop up a grapefruit sized piece of dough (or more or less) and put it on the floured surface, turning to coat all sides with flour. Knead the dough for 1 to 2 minutes, or until the dough is smooth and no longer sticky. Add more flour as needed. Shape the dough into a round or oval loaf. The final loaf will be double the size of the original piece of dough. Return the unused dough in the lidded container to refrigerator. Place the loaf on a pizza peel or a large cutting board that has been covered with parchment paper and generously sprinkled with cornmeal. Loosely cover the dough with oiled saran and let rise until doubled in size, about or 60 to 90 minutes. This will vary depending on how cold the dough was coming out of the refrigerator and the temperature of the area the dough will be rising in.
3 Thirty minutes before baking time, preheat the oven to 400˚F degrees, with a baking stone on the middle rack.
4 Just before baking, baste the top crust with the egg wash. Combine the extra pumpkin, sunflower, and sesame seeds with the poppy seeds and sprinkle the surface of the loaf with the seeds.
5 Slide the parchment paper and the dough directly onto the hot stone. Bake for about 35 to 45 minutes, or until richly browned and firm. Smaller or larger loaves will require adjustments in rising and baking times. Remove the bread from the oven and cool completely on a wire rack before slicing and eating.
Note: I find that the refrigerated dough needs at least 1 1/2 to 2 hours to rise. If using the dough immediately, then 45 to 60 minutes is about right.
Note: I don’t normally slash the loaves before baking. The seeds are quite coarse and make slashing somewhat difficult which could result in deflated dough.
The lady in the link below runs a B&B and makes this wholewheat seed bread and has a good explanation on her blog.
The original recipe of Zoe and Jeff uses plain white bread flour. They have a cookbook out called "Artisan Bread in 5 Minutes a Day", with all kinds of adaptations from that original recipe. For step-by-step pictorial instructions on how to make their 5 minute no-knead bread, have a look at this link.
Follow these Steps for Making and Baking the Same Day
2/3 cup whole-wheat flour
1/2 cup old fashioned oats
1 cup flour
1 heaping Tbsp gluten
1 Tbsp flax seed, plus 1 Tbsp for sprinkling on top
1/4 cup pumpkin seeds, plus 1 Tbsp for sprinkling on top
1/4 cup sunflower seeds, plus 1 Tbsp for sprinkling on top
1 Tbsp sesame seeds, plus 1 Tbsp for sprinkling on top
1 scant Tbsp poppy seeds for sprinkling on top
1 tsp salt
1 cup hot water
1 large tsp yeast
1 heaping Tbsp honey
1 heaping Tbsp oil
1 Combine the whole-wheat flour, oats, seeds, and hot water in a large bowl. Stir to combine, cover with saran, and soak for 2 hours.
2 Add all the remaining ingredients except for the seeds used for sprinkling and mix to combine with a Danish bread whisk. If the dough seems a bit sticky, add a bit more flour. If the dough seems too stiff, add a bit more water. Cover with saran and let rise until doubled in size, about 2 hours.
3 Turn the dough out onto a lightly floured surface and shape into an oval loaf. If the dough is still quite tacky, knead in enough flour so you can handle the dough without it sticking. Shape the dough into an oblong loaf and put in a basket that has been lined with parchment paper. Cover with saran and let rise the dough has doubled in size, about 1 to 2 hours.
4 Preheat the oven to 400˚F degrees, with a baking stone on the middle rack. Combine the remaining sprinkling seeds.
5 Baste the risen loaf with egg wash and sprinkle the top with the remaining seeds. Use the parchment paper to lift the loaf out of the basket and onto the baking stone. Bake for 35 to 45 minutes, or until nicely browned. The loaf should sound hollow when thumped. Remove from the oven and transfer to a wire rack to cook completely before slicing and serving.
Makes 1 loaf.
This dough is easier to combine if one has a Danish dough whisk.
Last edited by redforever; 09-08-2012 at 04:18 PM.
The Following 3 Users Say Thank You to redforever For This Useful Post:
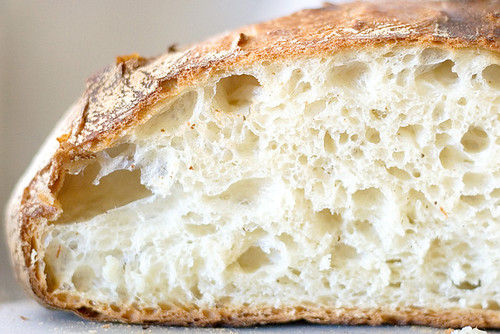
Try some no knead bread. I don't have any pictures of bread I've made, but it usually comes out looking like this:
Very high moisture content with a long fermentation (usually 18-24 hours) makes for an excellent tasting bread. In most cooking I'm a firm believer of keeping it simple and letting quality ingredients shine through and this is a good example with only 4 ingredients (flour, water, yeast, and salt).
I came expecting acid. Surely a fifty-year school career has yielded untold stories. On the other hand, the thought of peter12 on acid compels me to pray in the opposite direction.
1 1/2 cups lukewarm water
1 Tbsp granulated sugar
1 Tbsp yeast
1 tsp salt
2 to 2 1/2 cups all-purpose flour
1 Tbsp oil
1 Tbsp sesame seeds or seeds of your choice, for the top
Egg wash, for the top
1 Put the water, yeast, and sugar in the bowl of a stand mixer equipped with the bread hook. Stir to dissolve and let proof until foamy.
2 Add 2 cups flour and the salt and mix to combine. If required, slowly add some of the remaining flour just until the dough starts to leave the sides of the bowl. Knead until the dough is smooth and elastic. Shape dough into a ball and put in a lightly greased bowl, turning to coat. Cover with saran and let rise in a warm place until doubled in size, about 45 minutes to 1 hour.
3 Punch the dough down and shape into a ball again. Put the dough back into the bowl, cover with saran, and let rise one more time. The second rise will be quicker, about 45 minutes. When the dough rises twice, you get a better bread. If you are short on time, you can get by with just one rise.
4 Line an oval or rectangular baking pan with parchment paper and lightly dust with flour or cornmeal. Turn out the risen dough to a lightly floured surface and shape into an oval with rounded ends. Carefully transfer the shaped loaf to the parchment lined baking pan. Place the loaf in the middle of the parchment, cover loosely with saran, and let rise until almost doubled in size, about 30 minutes.
5 Preheat the oven to 375F. Prepare the egg wash. Put an egg in a small bowl and beat well. Add 2 to 4 Tbsp water and 1 Tbsp oil and mix to combine.
6 Baste the loaf with the egg wash just before it goes into the oven. This makes the crust nice and crunchy. Sprinkle seeds of your choice or a little sea salt on top of the loaf. Use a sharp serrated knife to slash the top of the loaf at a 45 degree angle.
7 Bake for 30 minutes, or until the loaf is golden brown and it makes a hollow sound when you thump it. Rotate halfway during baking. Remove the baked loaf from the oven and transfer to a wire rack to cool before slicing and serving.
Note: I take the loaf out of the pan halfway during baking. First feel the crust to make sure it has set up. Use the sides of the parchment paper to lift the loaf out. Continue baking the loaf on the parchment paper until done.
1) How foamy is considered enough, what should it look like? I have let yeast proof this way before and it looks like some of the yeast just expand, but not really foamy per se? Also, if you let it proof too long, is that bad or does it matter?
2) How warm? Is 21 deg good enough, or warmer than that? Or more like 30?
How does the bread shape affect the baking time and temperature? If you make 2 baguettes would that take shorter than the larger loaf? How do you sort out how much time to bake, and at what temperature?
i'd like to buy a cologne that smells like fresh bread.
two comments about bread that amuse me:
- "hey baby, if you want more bread, "do" a baker - this was from to live an die in LA
- bake on loaf of bread are you a baker, but suck one @#$% and you are a @#$%sucker - my old boss
anyways, carry on, who does not love the smell of fresh bread.
__________________
If I do not come back avenge my death
NEZ: THE BAKERY!!! You smell like the BAKERY. What's the name of that perfume? you're wearing.
TIA: It's Bread by Calvin Klein.
NEZ: CALVIN KLEIN!? No, no. That's my idea. They, they stole my idea. Y' see I had the idea of a cologne that makes you smell like you just came from the bakery.
JERRY: I know look at this,
NEZ: Whooo, ..That's you! What is going on here?! He laughs at me then he steals my idea. I could have been a millionaire. I could have been a fragrance millionaire, Jerry...They're not going to get away with this.
1) How foamy is considered enough, what should it look like? I have let yeast proof this way before and it looks like some of the yeast just expand, but not really foamy per se? Also, if you let it proof too long, is that bad or does it matter?
2) How warm? Is 21 deg good enough, or warmer than that? Or more like 30?
How does the bread shape affect the baking time and temperature? If you make 2 baguettes would that take shorter than the larger loaf? How do you sort out how much time to bake, and at what temperature?
Thanks.
If you are using instant or quick yeast that looks like grains of sand, this is enough proof for the yeast. You can still see the water around the outside edges and the yeast is floating on the top, is a cohesive mass, and is starting to bubble and foam.
If you are using old fashioned yeast, that looks like granular balls, then you should let it go through a full proof. This will take about 10 to 15 minutes. The granular balls of yeast are too large to dissolve if you just add them to the dough with all of the dry ingredients. I rarely use this type of yeast anymore and am not actually sure what it is called now, maybe slow rise yeast? Anyhow, if it is not quick, instant, or bread machine yeast, it is probably the old fashioned granular ball yeast.
I don't usually proof my yeast. I bake all of my own bread, except for odd hot dog buns or hamburger buns that I buy if I am in a hurry. Because I am using my yeast on a very regular basis, I know that it is fresh. Also, I usually use the quick rise yeast, so it can be added in with the dry ingredients without prior proofing. For those who do not bake on a regular basis, or for those who are using the larger granular yeast, you proof the yeast to check if it is active. If it does not foam up, chuck it and get new yeast.
2) Room temperature is fine for proofing bread, as long as it is in a draft free place. You can put the dough in a bowl, cover with saran, and then cover with a terry towel to ensure even warmth. I proof the initial unshaped dough in my oven but it has a proof cycle on it which is 100F. You can proof bread at a slightly higher temperature but I would never go higher than 120F myself. If you proof bread too fast, it will not have quite as nice a texture or taste. Gluten and taste need time to develop when making bread. This is similar to making a good stew. It needs a long enough time to braise properly so the meat is not only tender but also tasty.
3) Baking temperature is usually the same, no matter how you shape your dough, assuming you have made either a loaf, baguette, or rolls, all from the same recipe. If you use different recipes, baking temperatures of course can vary.
Baking times however will not be the same if you shape the dough differently. Individual rolls bake quicker than pan rolls, and rolls will bake faster than a loaf of bread will. A baguette will usually bake faster than a loaf of French bread because it is smaller in size. The end results should all look the same though, in terms of color and texture and taste. The outside crust might vary somewhat though so for instance, do not expect pan rolls to be as crusty as individual rolls and do not expect a loaf of bread that is baked in a pan to be as crusty as a loaf of bread baked freeform on a bread stone.
So how do you tell then, if bread is really done? Well, a good loaf of bread will be nicely browned, golden brown or a bit darker depending on the type of flour used and depending on if you used a glaze on the bread prior to baking it. A loaf of bread will be nicely browned on the bottom as well and if you lift the bread and give it a thump, it will sound hollow when done. Of course, with experience, this all becomes second hand.
When making Artisan breads, which are usually baked freeform at higher temperatures, it is good to have an instant read thermometer. They brown quicker and deeper in color and you might be fooled into thinking that your bread is done when it might not be so in the middle of the loaf. Bread is considered done if it registers 190F to 200F in the middle of the loaf. If you do buy an instant read thermometer for bread, make sure it has a long thin sort of needle that you would use to poke the bread. It won't damage your bread or crust.
Here is bread all baked from the same recipe at the same temperature. Baking times varied because the dough was shaped differently. Notice that they are all basically the same color? That is because they are made from the same recipe and baked at the same temperature.
Single or individual Rolls take the least amount of time to bake because the heat from the oven can cook the rolls from the top, sides, and bottom. I bake these type of rolls on parchment paper and never have the problem of the bottoms of the rolls getting too dark.
Semi Individual Rolls...baked together but not fully together. They will take a bit longer to bake than the individual rolls above, but not signifantly longer. I baked these on parchment lined baking sheets as well. I have a large oven and large baking sheets that are about 12 x 18-inches in size.
Mini loaves - about the size of 2 individual rolls so take a bit longer to bake but not twice as long. When the tops of the loaves look about right, take one out of the pan, turn it over, and check if the bottom and sides are browned nicely as well. These were baked in a commercial pan. These type of commercial pans are coated with a non-stick glaze and they truly do not stick.
These are pan or tray buns and I bake them in a pan that is about as deep as a cake pan so maybe 2 to 3 inches deep. I did not line the pan with parchment and instead just lightly coated the pan with cooking spray These type of buns take longer to bake because they have risen together so hot oven air is not circulating around the individual buns. These took about as long as a loaf of bread to bake.
Bread is pretty forgiving when it is almost baked. If you thought the rolls looked nicely browned, took them out of the oven, and out of their pan, only to find out that the bottoms were still not very brown, just put them back in the pan and bake until they are actually browned and fully baked. If you find the top of the bread is getting too dark and the bottom is still not dark enough, just throw a sheet of foil loosely over the top of the bread. Most bread is baked on the middle shelf in the oven, or the shelf just below the middle one, and that is to prevent the tops from browning quicker than the bottoms.
These loaves of bread will bake in about the same time as tray buns, so about 30 to 45 minutes, depending on the size of your loaf pans. My pans are about 4 1/2 x 8 1/2-inches in size.
Last edited by redforever; 10-14-2012 at 09:29 PM.
The Following 9 Users Say Thank You to redforever For This Useful Post:
This thread just made me incredibly hungry. Thanks for all the good tips and recipes!
__________________
The Quest stands upon the edge of a knife. Stray but a little, and it will fail, to the ruin of all. Yet hope remains while the Company is true. Go Flames Go!
You don't necessarily have to activate the yeast. It depends on what kind you use. If you use the quick rise or instant yeast, it can simply be mixed in with the dry ingredients and used without proofing.
Yes, i am aware of that but i screwed up a lot of recipes not knowing the difference.


 ((
((