Pictures of both the loaf and the interior of your bread would help.
Salt is easy to control....I never add more than about 1 to 2 tsp for 4 to 6 cups of flour.
Fluffiness can be determined by many factors.
1. Type of bread...breads baked with heavy flours and grains will not be as fluffy as those baked with all-purpose flour.
2. Too much flour makes bread dense and dry.
3. Over proofing and under proofing can affect the texture and fluffiness of bread.
4. Other ingredients affect the fluffiness as well. Things like milk instead of water, the addition of eggs, butter instead of oil, all affect the texture. Generally, the richer the dough, the fluffier it will be.
5. Kneading of course will affect the fluffiness. Some breads are meant to just be mixed, proofed, and baked, with little fuss inbetween. Others demand a long kneading process to ensure that the dough is smooth and elastic.
6. Number of rises affects the fluffiness. Breads that go through more than one rise are fluffier.
Start with a very basic dough and master it and then go on to other types of bread.
Here is one that is pretty easy to master. All the pictures are of the bread that I made using the following recipe. If you don't have a stand mixer, this dough is also easy to knead by hand as the amounts are small and you just get one loaf. I have also used this recipe to make two baguettes which makes very nice crostini to serve bruschetta with.
Sometimes I make the bread free form, in other words, not baked in a pan. I let it rise, usually on parchment placed on something like a pizza peel or the back of a cookie sheet. Then I use the parchment to either slide it off the pizza peel onto a bread stone in the oven or I use the parchment to lift the loaf onto a bread stone in the oven. If you don't have a bread stone, then bake it on an inverted cookie sheet.
Freeform loaves will still rise nicely, but will spread just a bit more sideways. In other words, they won't be quite as high as loaves baked in a loaf pan. However, they should not be flat like a pancake unless you are making something like ciabatta.
Sometimes I bake this bread for half the baking time in a casserole dish and then take it out of the dish and finish the baking on a bread stone. When I bake the loaf this way, it will rise a bit higher. I line the casserole dish with parchment paper and then use that to lift the loaf out of the casserole dish after it has baked for half the time. By half time of baking, the crust is set enough that the loaf will not be damaged by lifting it, turning it, etc.
Rustic Italian Bread
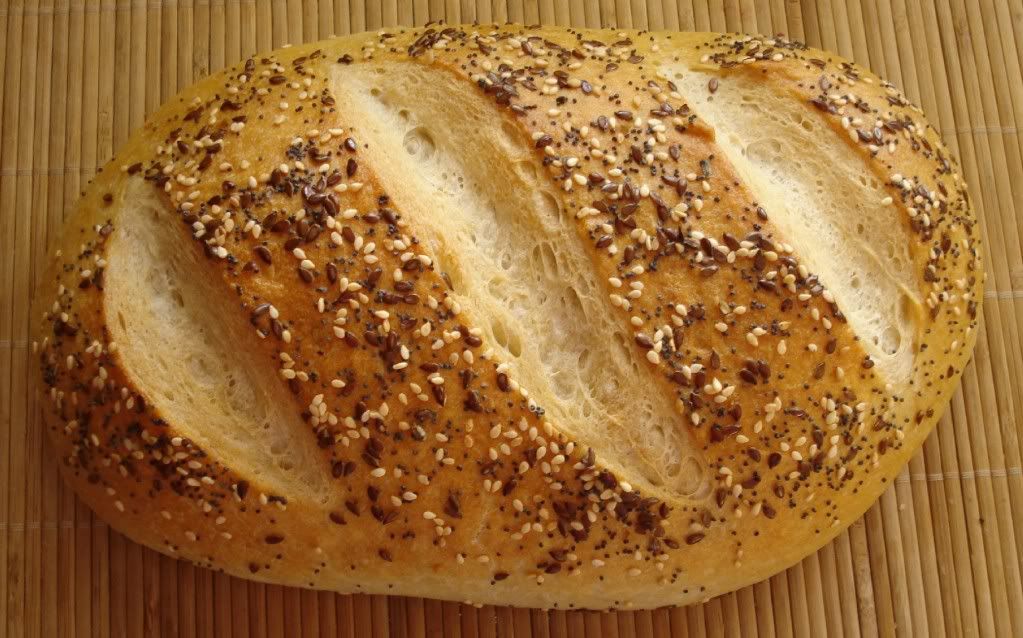
Rustic Italian Bread baked Freeform

Rustic Italian Bread baked half time in Stoneware Dish

Type of Stoneware Dish used but I only baked it half the time in this dish.

Inside Crumb
1 1/2 cups lukewarm water
1 Tbsp granulated sugar (scant)
1 Tbsp yeast
1 tsp salt
2 to 3 cups all-purpose flour
1 Tbsp oil
1 Tbsp sesame seeds or seeds of your choice, for the top
Egg wash, for the top
1 Put the water, yeast, and sugar in the bowl of a stand mixer equipped with the bread hook. Stir to dissolve and let proof until foamy.
2 Add 2 cups flour and the salt and mix to combine. If required, slowly add some of the remaining flour just until the dough starts to leave the sides of the bowl. Knead until the dough is smooth and elastic. Shape dough into a ball and put in a lightly greased bowl, turning to coat. Cover with saran and let rise in a warm place until doubled in size, about 45 minutes to 1 hour.
Note: If you are making this bread freeform, add a bit more flour. The dough should be a little bit stiffer so it does not spread sideways too much during proofing and baking. Scroll down and take a look at picture 4 in post 84 of this thread. The dough for this Italian bread should be a bit stiffer than the dough pictured for the bread twists. In other words, it will still hang and start to drop from the bread hook, but not quite as freely.
3 Punch the dough down and shape into a ball again. Put the dough back into the bowl, cover with saran, and let rise one more time. The second rise will be quicker, about 45 minutes. When the dough rises twice, you get a better bread. If you are short on time, you can get by with just one rise.
4 Line an oval or rectangular baking pan with parchment paper and lightly dust with flour or cornmeal. Turn out the risen dough to a lightly floured surface and shape into an oval with rounded ends. Carefully transfer the shaped loaf to the parchment lined baking pan. Place the loaf in the middle of the parchment, cover loosely with saran, and let rise until almost doubled in size, about 30 minutes.
5 Preheat the oven to 375F. Prepare the egg wash. Put an egg in a small bowl and beat well. Add 2 to 4 Tbsp water and 1 Tbsp oil and mix to combine.
6 Baste the loaf with the egg wash just before it goes into the oven. This makes the crust nice and crunchy. Sprinkle seeds of your choice or a little sea salt on top of the loaf. Use a sharp serrated knife to slash the top of the loaf at a 45 degree angle.
7 Bake for 30 minutes, or until the loaf is golden brown and it makes a hollow sound when you thump it. Rotate halfway during baking. Remove the baked loaf from the oven and transfer to a wire rack to cool before slicing and serving.
Note: I take the loaf out of the pan halfway during baking. First feel the crust to make sure it has set up. Use the sides of the parchment paper to lift the loaf out. Continue baking the loaf on the parchment paper until done.
************************************************** *****************************************
EDIT: I just made this loaf again, freeform, so took a few pictures to show the process.

This is about what the final dough should look like when baking this bread free form. I used about 3 cups of flour and kneaded the dough about 6 minutes in total. When making this bread freeform, you will need a slightly stiffer dough. That means you will probably need the greater amount of flour called for in the recipe rather than the smaller amount of flour. The dough will still fall off the hook but slower and the dough will look a bit more blob shaped. Also, see how clean the bowl is now? The dough clears the sides of the bowl at this stage and makes a slapping sound while it is being kneaded.
Just remember that when you make bread, you will rarely follow the recipe exactly for the amounts of flour called for. You are trying to achieve a certain texture of dough and that will depend on the humidity on that day, the type of flour used, the brand of flour, and so on.

When the dough is of the right texture, you should be able to create enough surface tension on the exterior of the dough as you shape it into a ball, that it holds its shape farily well. The dough should look smooth and satiny and elastic. I am holding the dough with one hand and taking the picture with the other hand and while the dough is soft enough to droop a little bit, it is certainly not losing its shape and hanging down or falling off my hand. If the dough is too goopy and sticks to your hands when you try to do this, you probably need to add a bit more flour to the dough. Watch the video below in post #25 (around the 2:15 mark) to see how the dough is shaped into a ball of dough. You are trying to pull the dough down from the top and under itself.

The dough has gone through the first two initial rises in the bowl. Now I have shaped the dough and put it on a lightly floured sheet of parchment paper which was placed on a pizza peel. Then I covered the dough and put it aside in a warm draft free place for its final third proof or rise before it goes in the oven to bake. This last rise or proof will take about 20 to 30 minutes.

The dough proofed for about half an hour and is now about double its original size.

I basted the loaf with an egg wash and sprinkled it with some seeds.

Next I slashed the loaf.

The oven was preheated while the loaf was going through its final proof, so for about 30 minutes. The bread stone was in the oven while the oven was preheating. I baked the bread, still on the parchment paper, on the bread stone for half the baking time. Then I slid the loaf off the parchment paper directly onto the bread stone. I rotated the bread at the same time so it would brown evenly. I continued to bake the bread this way for the rest of the baking time.

This is the final loaf, just out of the oven. See the little cracks starting to form on crust of the loaf. They say that when the bread crackles as it starts to cool, it is singing to you

))))

This is the bottom crust which is pretty well the same color as the rest of the crust on the bread.